LiveCanvas Quick Start Guide
LiveCanvas Beginner Quick Start Guide
A simple starter guide to help you begin building pages with LiveCanvas.
1. What is LiveCanvas?
LiveCanvas is a visual page builder for WordPress that allows you to design website pages using Bootstrap-based layouts and live editing.
Unlike many drag-and-drop builders, LiveCanvas gives you clean code and more design control, while still making it easy to visually build pages.
Why People Use LiveCanvas
Build modern website layouts quickly
Design pages without needing advanced coding skills
Use Bootstrap layouts for responsive design
Create lightweight pages with clean HTML
Maintain more control than traditional page builders
Example:
You can quickly create a section with a heading, image, and button for a landing page without writing full HTML.
2. The LiveCanvas Editing Workflow
Most work inside LiveCanvas follows the same simple structure.
Basic Page Structure
LiveCanvas pages are built using sections and layout blocks.
Typical workflow:
1. Open a page in the LiveCanvas editor.
2. Add a section to your page.
3. Insert a row inside the section.
4. Add columns inside the row.
5. Place content elements inside the columns.
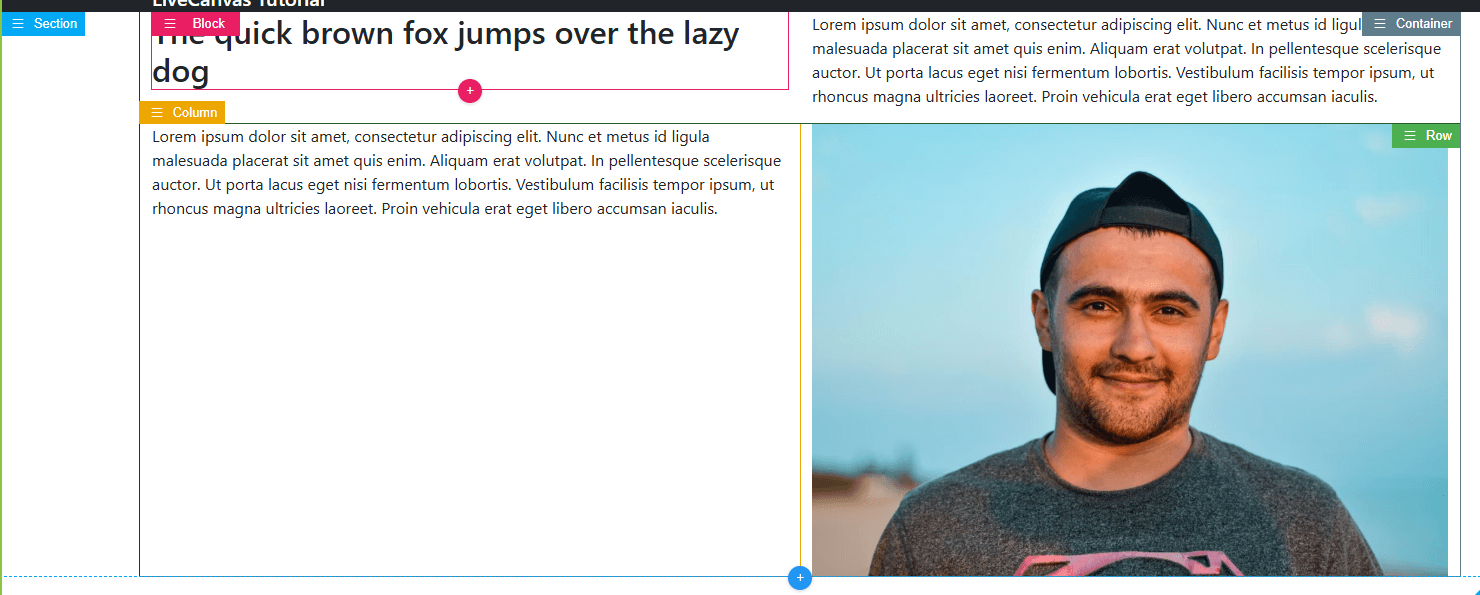
The following image shows a section containing two rows each having two columns,
The first column in the first row contains a heading content block. The second column has a text paragraph content block.
The first column of the second row has a text paragraph content block and the second column an image content block.
Example Layout Structure
Section
→ Row
→ Column
→ Heading
→ Image
→ Button
Think of it like building blocks stacked on top of each other.
3. The 7 Most Important Things Beginners Should Learn First
1. Sections Control Page Structure
Sections are the main containers of your page.
Use them to group content like:
Hero sections
Feature sections
Testimonials
Contact sections
Tip:
Start with one section at a time to avoid messy layouts.
2. Rows and Columns Create Layouts
Rows and columns determine how your content is arranged.
Examples:
1 column → Simple centered content
2 columns → Image + text layout
3 columns → Feature grid
Tip:
Most pages look clean with 1–3 columns per row.
3. Content Goes Inside Columns
Elements like:
Headings
Text
Images
Buttons
Icons
are placed inside columns.
Tip:
Keep columns focused on one main message.
4. Spacing Makes Layouts Look Professional
Spacing includes:
Padding (space inside elements)
Margins (space between elements)
Good spacing makes your page easier to read.
Tip:
Avoid overcrowding sections.
5. Backgrounds Improve Visual Design
Sections can have:
Solid colors
Images
Gradients
These help separate different parts of your page.
Example:
Hero section with a background image and overlay text.
6. Mobile Layout Matters
LiveCanvas uses Bootstrap, which helps pages adapt to different screens.
Always preview:
Desktop
Tablet
Mobile
Tip:
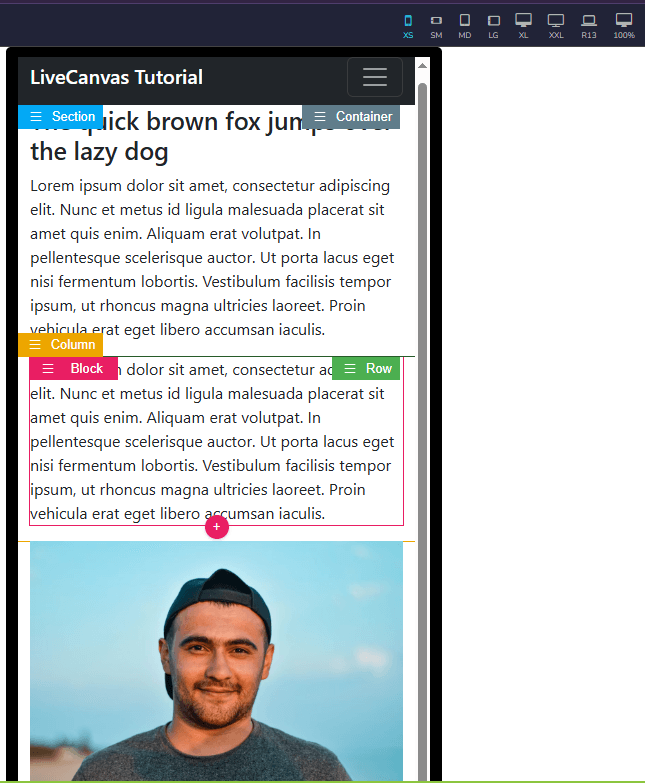
Columns often stack vertically on mobile.
The next image shows the mobile view of the previous example. Note the buttons in the top right to select the different view sizes.
7. Reusable Sections Save Time
You can save sections and reuse them across pages.
Examples:
Call-to-action sections
Testimonials
Contact blocks
Tip:
Reuse layouts to build pages faster.
4. Example: Build a Simple Section
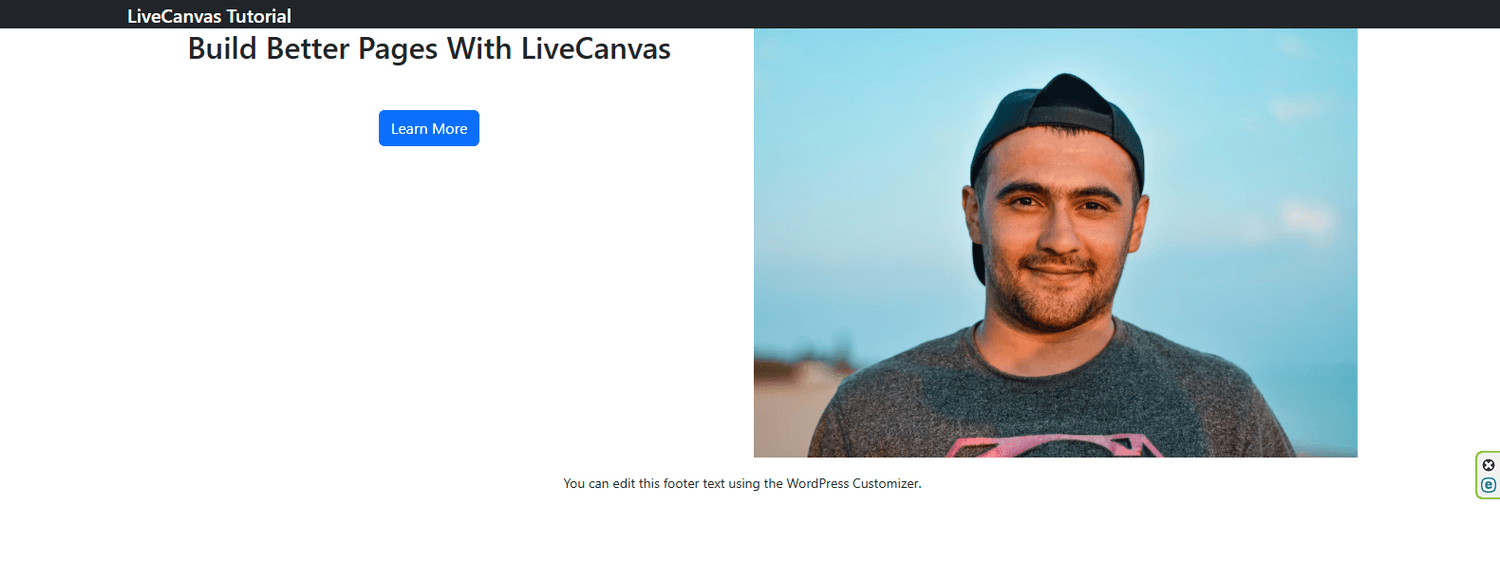
Let’s create a basic section with:
Heading
Image
Button
This is one of the most common layouts used on websites.
Step 1: Add a New Section
Open your page in LiveCanvas.
Add a new section to the page.
This section will hold your content.
Step 2: Insert a Row
Inside the section:
Add a row.
Rows help organize columns and content.
Step 3: Add Columns
Add two columns.
Example layout:
Column 1 → Text
Column 2 → Image
This creates a common text + image layout.

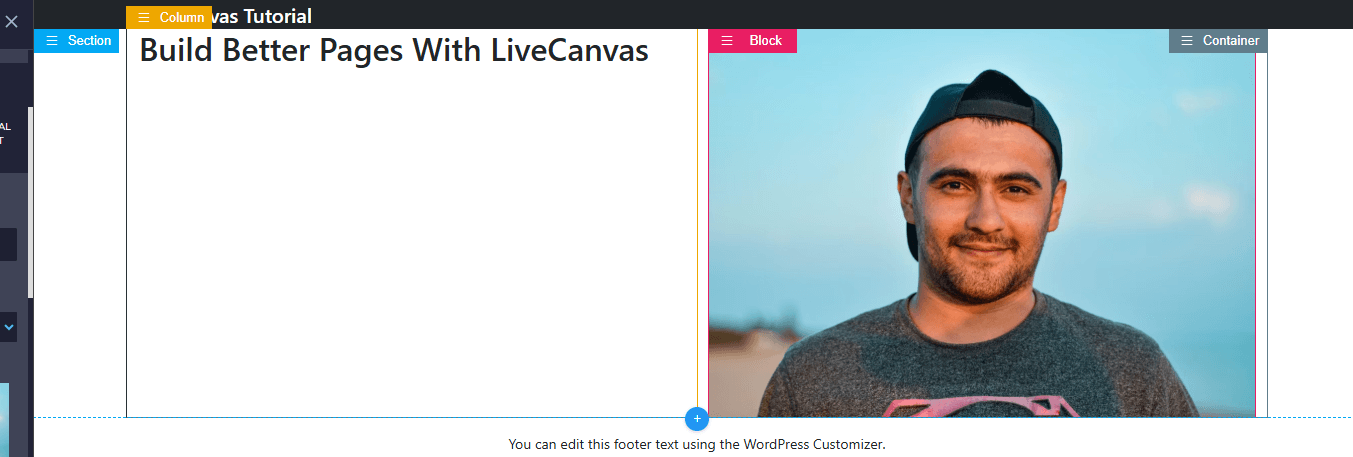
Step 4: Add a Heading
Inside the first column:
Add a heading element.
Example:
Build Better Pages With LiveCanvas
Keep headings short and clear.

Step 5: Add an Image
Inside the second column:
Insert an image element.
Upload an image or choose one from the media library.
Step 6: Add a Button
Below the heading, add a button.
Example button text:
Learn More
Add a link to:
another page
a contact form
a product page
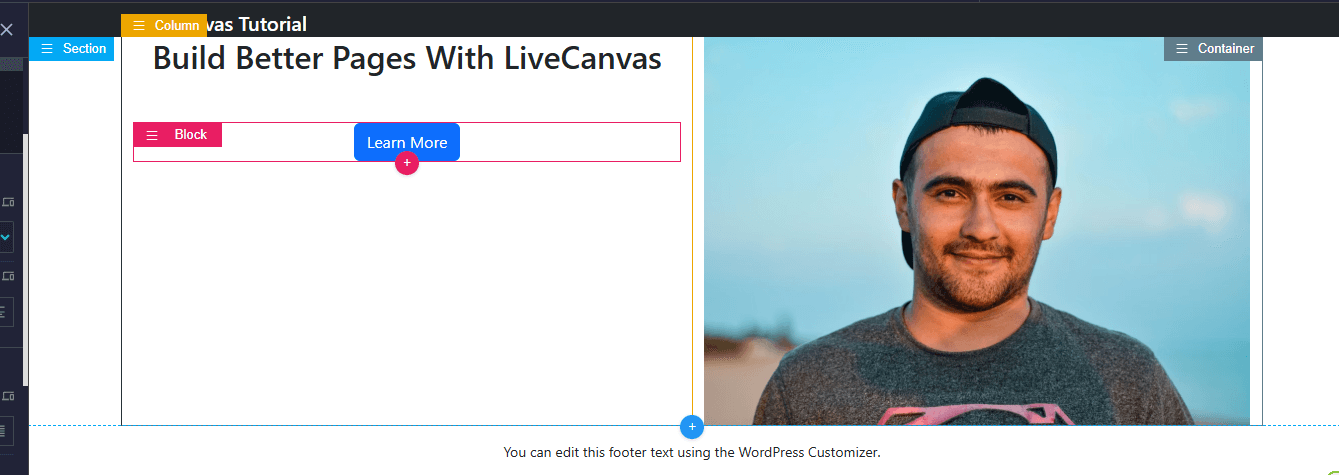
Final Layout Example
Section
Row
Column 1
Heading
Button
Column 2
Image
You now have a simple professional section.
5. Beginner Tips
Keep Layouts Simple
Avoid too many columns or elements in one section.
Clean layouts are easier to read.
Use Consistent Spacing
Make sure spacing is consistent between sections.
Uneven spacing can make pages feel messy.
Test Mobile Layouts
Always check mobile previews.
Small fixes can dramatically improve mobile usability.
Limit Colors
Too many colors make pages look unprofessional.
Stick to 2–3 main colors.
Reuse Good Sections
When you build a section you like:
Save it and reuse it on other pages.
This saves time and keeps your design consistent.
Final Thoughts
LiveCanvas is powerful because it combines visual editing with clean code and flexible layouts.
Start by mastering:
Sections
Rows
Columns
Simple content elements
Once you understand these basics, you can quickly build beautiful, responsive pages with LiveCanvas.
Click the link below and see how you can start building faster today.
Create Your Free Account